Enable the 'Single button press for hold interactions’ option in Game Settings for smoother crafting and interaction functionality. Familiarize yourself with HUD elements and controls for a better understanding, as these foundational tools will streamline your experience in Palworld.
Preparing Your Controls and Settings
Optimizing your controls and settings can make Palworld easier to play, especially during longer sessions.
prerequisites
- Enable 'Single button press for hold interactions’ in the Game Settings to simplify crafting and interaction processes.
- Assign a comfortable key for auto-run to reduce fatigue during extended exploration.
- Adjust the field of view settings to ensure visibility in various environments.

The settings menu displays the 'Single button press for hold interactions' option set to ON under keyboard controls. — P4wnyhof
Understanding the HUD
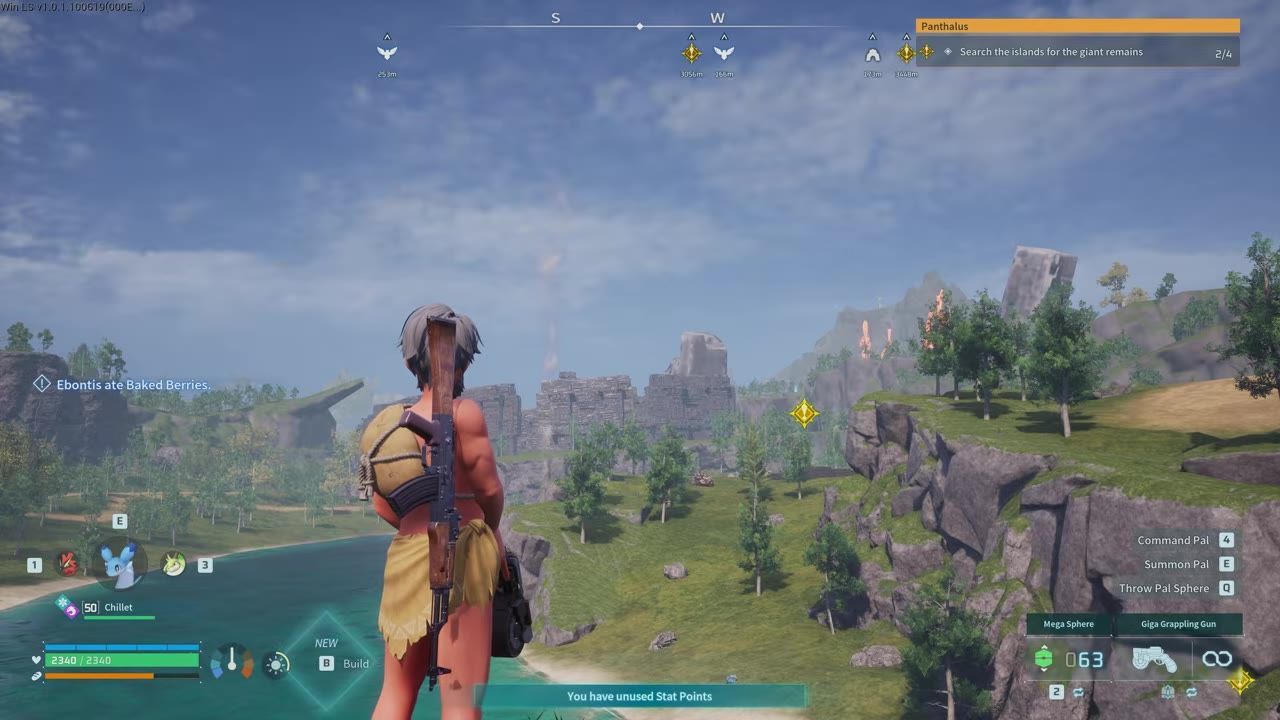
The HUD provides essential gameplay information, making it easier to navigate the world of Palworld.
- The health bar, hunger gauge, and hot/cold meter indicate your character’s survival status.

The HUD displays health, hunger, temperature, and inventory details at the bottom of the screen. — Ebontis
Stat Management for New Players
Efficient stat allocation can set you up for success, especially early in the game.

Character stats menu displays health, stamina, weight, and other attributes with inventory items visible. — P4wnyhof
Interface Navigation
Understanding the interface can help access key features efficiently.
steps
- Open your inventory using the designated shortcut; use the bulk storage feature (R key) to quickly organize items into chests.
- Navigate the technology tree to progress through unlockable gear and abilities.
- Use the monitoring stand at your base to assign work preferences to Pals and control resource distribution.

The inventory screen displays items, character equipment, and storage options. — Cohh
Basic Gameplay Mechanics
To progress smoothly, mastering gameplay essentials is crucial.
steps
- Capture initial Pals (like Daydream) to assist in battles and resource collection.
- Use critical and back hits for increased capture chances—aim for the face or back for bonus results.
- Gather five of each Pal type to unlock effigies for permanent stat boosts.
- Utilize ranches for passive resource generation of items like wool, eggs, and venom glands.
Tips on Exploration and Survival
Exploration opens up numerous opportunities, but survival requires strategic planning.
steps
- Practice grappling hook gliding as an efficient movement strategy to cover greater distances quickly.
- Carry Pals with hot/cold resistance to counteract extreme environmental temperatures.
- Use mounted Pals for faster transportation or heightened combat abilities.
Frequently Asked Questions (FAQ)
FAQ
how to use HUD in Palworld
The HUD includes essential survival and navigation tools, such as the health/hunger bars, temperature indicator, and quest tracker. These elements help keep track of your progression, orientation, and vital statistics.
Palworld starting controls
Begin by enabling 'Single button press for hold interactions’ in the Game Settings for improved convenience. Familiarize yourself with auto-run and field of view adjustments, and customize controls to suit your comfort.
guide to play Palworld
To get started in Palworld, establish a base, capture Pals to assist with resources and combat, and begin exploring the terrain while working through the technology tree. Utilize ranches and assigned Pals for efficient resource management, and follow the main mission to advance your progress.
Sources
Screenshots on this page are frames from the videos below, used to illustrate the steps they describe. All rights remain with their creators.
- 18 Starter Tips Every Palworld 1.0 Player Needs to Know! — P4wnyhof, July 13, 2026
- Palworld 1.0 - Ultimate Beginners' Guide — Ebontis, July 22, 2026
- 14 Things I Wish I Knew Before Playing Palworld 1.0 — Cohh, July 22, 2026
Checked against:
- v1.0.3: Balance Adjustments & Bug Fixes — pocketpair_dev, 2026-08-12
- v1.0.2.101103:Bug fixes — pocketpair_dev, 2026-07-30
- v1.0.2: Bug fixes — pocketpair_dev, 2026-07-29