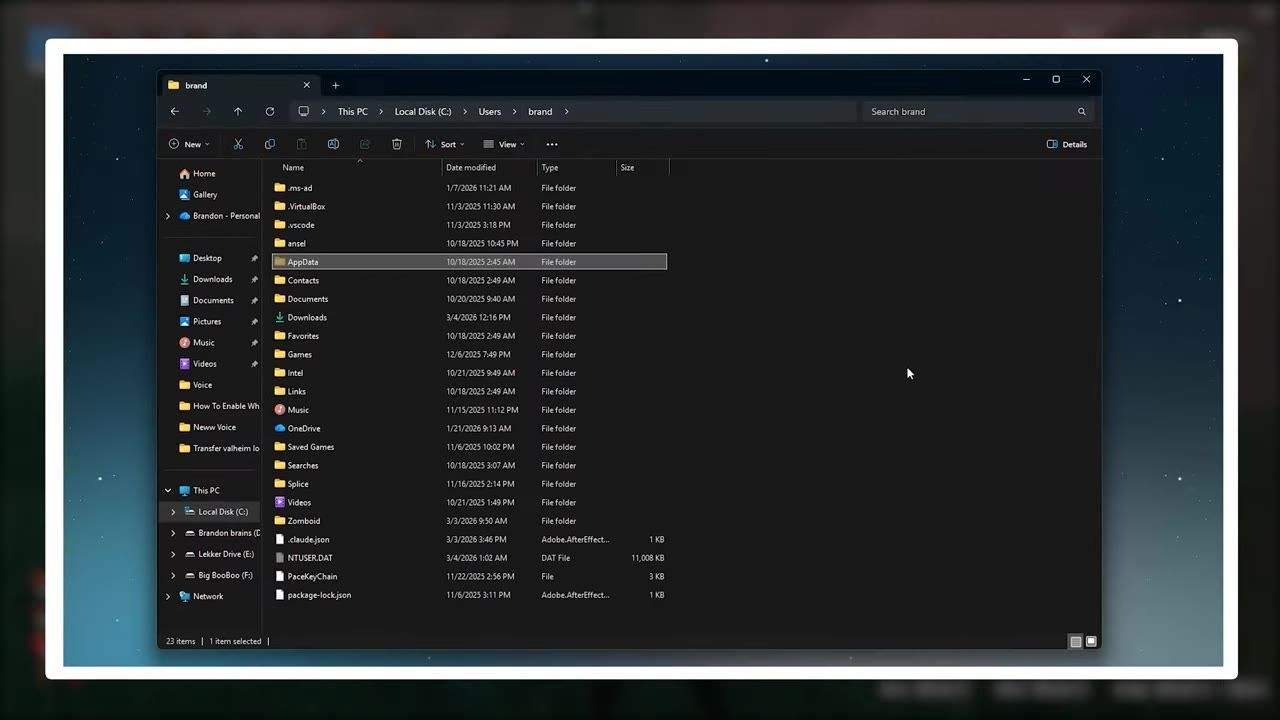
To upload and manage Valheim server saves, locate your local save files, create a backup, prepare them for upload, and configure your server settings accordingly.
Locate Your World Save Files
Valheim world save files are stored in the AppData folder on Windows. If you cannot see this folder, you'll need to enable hidden items in File Explorer. Select the "View" tab, then check the "Hidden Items" box to make it visible.
Two files are required to upload your world—one with a .db extension and another with a .fwl extension. These files must have the same name as your world and cannot be renamed. If you cannot find these files, ensure that your current saves are stored locally instead of in the cloud by checking the manage saves screen in Valheim.
Steps
- Navigate to the AppData folder on your computer (ensure hidden items are visible).
- Locate your world files, which have a matching
.dband.fwlextension. - Verify the files are stored locally and not in the cloud.
Prepare Your Save Files
Creating a backup of your save files is essential before uploading. Copy both the .db and .fwl files to a safe location such as your desktop or documents folder. This ensures you can restore your world if something goes wrong.
Next, compress the save files into a zip folder. Select both files, then right-click and choose "Send to Compressed Zip Folder." Name the zip file so it’s easy to recognize.
Steps
- Copy both
.dband.fwlfiles to a safe location. - Select both files, right-click, and choose "Send to Compressed Zip Folder."
- Name the zip folder appropriately for identification.

Multiple files, including a compressed zip folder, are shown in a file explorer window. — All Things Hosting
Upload Save Files to Your Server
Before uploading files, stop your dedicated server completely. Servers don’t allow file uploads while running. Next, use your hosting provider's file manager to access the worlds_local folder. If the folder doesn’t exist, start the server once to generate the folder structure, then stop it again.
Upload the zip file containing your save files to the worlds_local folder. Once the upload completes, unzip the files directly in the folder, and delete the zip file after extraction.
Steps
- Stop your server via the hosting provider's control panel.
- Navigate to the
worlds_localfolder in the file manager. - Upload the zipped save file to the folder.
- Unzip the save file and delete the zip after extraction.

The worlds_local folder visible in the server's file manager interface. — All Things Hosting
Configure Server Startup Settings
The server's startup configuration must match your world save files for the system to load correctly. Set the world name in your server’s configuration file to match the save files' name, excluding the extensions. For instance, if your world files are myworld.db and myworld.fwl, set the world name to myworld.
Locate the field labeled "world name" or "-world parameter" in your hosting panel to update this setting.
Steps
- Open your hosting provider’s server configuration panel.
- Locate the "world name" or "-world parameter" field.
- Input your world’s name, ensuring it matches the file names without the extensions.
- Save the configuration changes.

A server settings interface displaying multiple parameters, including the world name field. — All Things Hosting
Test Your Server and Address Issues
After completing the upload and configuration, start your server and watch the console for errors during initialization. If the world loads correctly, connect to your server from Valheim to verify everything matches your local save.
Common issues include mismatched names, missing folders, corrupt files, and file size limits. If uploading via the panel fails due to file size, consider using an FTP client like FileZilla or WinSCP, ensuring the transfer mode is set to binary.
Steps
- Restart the server and monitor the console logs for errors.
- Connect to the server from Valheim to confirm the world upload succeeded.
- Address errors by verifying settings and using backups as needed.
- Use FTP for large files, ensuring binary transfer mode is enabled.

The server console displays logs of the world loading process with system metrics visible. — All Things Hosting
FAQ
FAQ
how to upload a singleplayer world to a Valheim dedicated server
To upload your singleplayer world, locate the world save files in the AppData folder, back them up, compress them into a zip file, and upload this zip into the worlds_local folder of your server. Configure the server's world name to match the save files and restart the server. Test the setup to ensure your world functions as expected.
Sources
Screenshots on this page are frames from the videos below, used to illustrate the steps they describe. All rights remain with their creators.
- Valheim: How to Upload Your World Save to a Dedicated Server (Step by Step) — All Things Hosting, March 5, 2026
Checked against:
- Valheim Has A Release Date! — IronMontilyet, 2026-06-07
- Patch 0.221.13 (Public Test) — IronMontilyet, 2026-05-06